DIY Synthetic Teak

Hurricane

Well-known member
Joined
11 Nov 2005
Messages
9,397
Location
Sant Carles de la Ràpita
Visit site
Thanks for those very kind words, John.
It has been a pleasure discussing the various options and sharing my findings with you.
People might be interested in my last PM to you when I explained that your experience in top welding made me have another go myself.
Top welding is a bit of a challenge.
If you read back, you will see that I bought a cheap hot air electronics soldering station to do my top welding.
Hand welding gives me the option to "pull away" from the job if the welding starts to go wrong.
Hot air soldering stations can be bought on eBay for about £40.
All my work to date has used one of these to do the final top welds to the mitre corners etc.
This is the one I bought:-
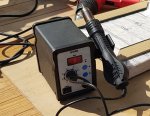
soldering station.resized.jpg

You have to feed the plastic welding rod into the joint manually but it gives me more control over the potential of damaging a panel that I have just spent a long time getting right!!

After finding that John managed to do the top welding in the same way as Trakmark had suggested - i.e. using his normal hot air welder with the speed welding nozzle, I thought I would have another go.
SWMBO bought me a new Leister Hot Jet S welder for Christmas.
One like this:-

url
s-l640.jpg


Being smaller, the new welder is significantly easier to use than my old Steinel one.
EDIT - sorry - I've mentioned this welder and the old Steinel one before.

So after installing the flybridge last month, last week, I thought I would have a go top welding with the new welder.
And I was pleasantly surprised to see that my test top welds looked great.
The big benefit of using the normal welding speed nozzle is that you can push the welding rod into the groove easier than just pushing it manually.

So, my thanks to John for showing me that top welding CAN be done by us - just like the professionals do.
 

Parabolica

Active member
Joined
6 Dec 2021
Messages
278
Visit site
There i was last night looking to see if there was any useful information online comparing teak vs faux teak and blow me down, it was here. What an absolutely fantastic thread, thankyou OP for taking the time to document and report your experience.

A few questions if i may;

- I note the pics do show the bathing platform is now a slightly different shade. You mentioned this was done using a different product which isn’t as colour fast. Will you be changing this to match the rest of the yacht and if so, do you envisage it being any more onerous to lift and make good the surface to that of when you changed the OE teak ?

- You have mentioned gluing down the flexi-teak down but there are no pictures showing the glue and how it was applied. Is it thixotropic and applied with a comb like tile cement or is it wet and applied with a brush or roller. And is it a contact adhesive applied to both surfaces and then requiring huge accuracy to get it on right first time or is it a wet lay product with time for adjustment to get everything just right ?

- Now that the product has been down for sometime, have you experienced any “blowing” caused where there is a glue void underneath and then heat of the sun has expanded the air within causing a slight blister ? This isn’t anything i have heard of before but just a logic-dictates-that-it-could-be-an-issue question.

- How have you found cleaning the Flexi-teak from stains such as red wine, coloured foods or bird droppings, by way of comparison to teak ? I had heard that red wine will stain it.


I am of course asking as this is something i know lies ahead of me and with your comments about the cleaning of teak and yet it always remaining dirty, memories of my last boat in 2000, have come rushing back as i was never happy with that either.

Many thanks in advance
 

Hurricane

Well-known member
Joined
11 Nov 2005
Messages
9,397
Location
Sant Carles de la Ràpita
Visit site
As you will have read, I split this project into stages/phases.
The first stage was to do the bathing platform so I had that done professionally using Flexiteek 2G.
The big issue that people have with synthetic teak is the surface temperature on a hot summer's day.
Our boat is in the Med so this was a concern.
The idea of doing the bathing platform first was "experiment" to see how hot it actually gets.
And, yes, it does get very hot - far hotter than wood.
However, there are significant advantages of synthetic over wood.
The main one being the ease of keeping it clean and looking like new.
Also, the surface of synthetic teak remains as smooth as new wood teak for the whole of its life.
Wood teak can be quite rough under foot as it gets older.
Whilst away from the marina, the synthetic teak doesn't get too hot.
This was mid summer in our lagoon in Sant Carles - Flexiteek:-
20180806_144349.resized.jpg
So, the hot deck issue isn't a big problem when you consider the ease of cleaning.

The second phase was the bow and side decks which I made and fitted myself.
Flexiteek isn't available for the DIY industry so I used Trakmark which is a slightly different shade.
It turns out that Flexiteek 2G changes to a pinkish colour over time.
Trakmark on the other hand seems to stay the same colour.
Thats the difference that you saw in the drone photo.
It would be nice to change the bathing platform to Trakmark but there really isn't a need so unless the colour gets worse, I will probably leave the Flexiteek alone.

The third phase was the flybrifge and was the hardest to do - the most work.
The panels were bigger and all the flybridge furniture had to come off first.

Finally, there is still the cockpit and flybridge stairs yet to do.
I've bought all the materials but the old wood is still in good condition so we are having a few years off before tackling that area.
That said, I have already templated the flybridge stairs so I may make those panels up sometime.
I quite enjoy making the panels.
Removing the old and fitting the new isn't fun.

Gluing down
The reason that there aren't any photos of the gluing process is that it has to be done quickly.
The adhesive that I use is supplied in tubes and sausages like Sikaflex.
You put it in a tube gun and squirt it on - level it out with a comb like tile cement (just on the deck - not onto the synthetic teak) and then roll the synthetic teak over it.
There is a little adjustment while sticking it down - we used clean trainers/deck shoes with a good grip to finally align the synthetic panels.
Then use one of these to finally stick it down and get all the air out:-

13.jpg
roberts-extendable-floor-roller-1875-p.png
13.jpg


Bubbles/blowing
Yes - that is a problem.
Even the professionally applied Flexiteek had bubbles.
You get better at gluing it down as you become more experienced.
I had several bubbles on the side decks but (hopefully) none on the flybridge.
The solution is to cut down the edge of a caulking line next to the bubble using a Stanley knife.
Peel back the Synthetic teak and clean out the old adhesive as far as you can reach.
Then squirt some new adhesive into the gap.
To begin, I used too much adhesive and spent a long time cleaning/sanding it down to create an invisible repair.
But, these days, I use far less adhesive and mask the area first.

How have you found cleaning the Flexi-teak from stains such as red wine, coloured foods or bird droppings, by way of comparison to teak ? I had heard that red wine will stain it.

The difference is like the difference between chalk and cheese.
You can scrub it, pressure wash it, use chemicals and if none of those work, you can sand it with sandpaper.
Have you ever dropped crisps on real teak - within seconds, the crisp leaves an oily smudge.
Nothing like that with synthetic teak.
After the boat has been in the boatyard, there is often a blue tinge to the decks from the antifoul dust that is floating around.
With wood, I use the old 2 part Wessex cleaner - hard work.
With the synthetic, I usually just wash them off with some soapy water but I also have a chemical treatment that I sometimes use to fully clean the deck.

If you have any further questions, please feel to ask at any time.
 
Last edited:

Nito

Active member
Joined
18 Sep 2020
Messages
174
Visit site
MUST NOT READ THESE KINDS OF THREADS!!!

Great work there Hurricane (and an awful lot of it!!)

Thanks for the thread, effort, photos, advice and information!
 

Hurricane

Well-known member
Joined
11 Nov 2005
Messages
9,397
Location
Sant Carles de la Ràpita
Visit site
There i was last night looking to see if there was any useful information online comparing teak vs faux teak and blow me down, it was here. What an absolutely fantastic thread, thankyou OP for taking the time to document and report your experience.
Did you also find these threads?

I started this one after installing the bathing platform with Flexiteek.
The idea was to get people guessing - was it real or synthetic?
Later in the thread, I revealed that it was synthetic:-
Teak Replacement

This one is a very recent thread where DavidJ asked what adhesive to use
This is my post (#7) linking to the actual adhesive that I use:-
What and how to stick down teak

And this thread was started by Dustywings - describing his excellent installation.
He also recommends the trader who did his job.
You might find it easier to get someone to do it for you.
If so, his work looks good:-
Squadron 58 Replacement Decks

Hope those links are useful - more reading though.
 

limecc

Active member
Joined
10 May 2017
Messages
325
Visit site
Was quite pleased with my Chinateak efforts last year (pics below) but yours is amazing workmanship I aspire to.

EVAdecking.jpg
ForedeckEVA.jpgUnderHelmEVA.jpg
 

TCommando

New member
Joined
15 Jan 2023
Messages
1
Visit site
I apologize in advance for digging up an old topic. But I wanted to share my experience with flexiteek. I have been making and installing real teak wood parts on yachts and boats for 15 years. Now that the economy in the world has changed and due to this real teak wood has become more expensive, our company decided to switch to flexiteek. I don't have much experience with flexiteek, but as far as I have worked with it, the experience is very bad. Installing real teak wood parts is much better and the end result is more beautiful. For Flexiteek, the substrate must be perfectly smooth because it copies all the irregularities on the substrate when installed with a vacuum. The only advantage of vacuum installation is that there are no air bubbles. When installing manually with a roller, you never know what the final result will be. You want to roll a lot, but there is still a big chance that a bubble will appear somewhere because the initial adhesion of the glue is not that good. When gluing Flexiteek, it has its own special glue whose working time is only 20 minutes. You have to act really fast so that it doesn't pull on the film. In our company, the parts ordered in advance according to the drawings are installed. We do not make them ourselves. I have tried different glues including two component epoxy. Unfortunately, normal Sikaflex does not glue this rubber. This is my experience and opinion about Flexiteek. I don't like it at all, but what can I do. The work must be done. :rolleyes:
 

Hurricane

Well-known member
Joined
11 Nov 2005
Messages
9,397
Location
Sant Carles de la Ràpita
Visit site
I use ARBOMERIC MP20 to stick the Trakmark product down.
But I have also suffered from bubbles in the past.
Indeed, my professionally installed Flexiteek also had some bubbles.
They are fixed quite easily by cutting down the edge of one of the caulking lines - then peeling it back and reapplying some adhesive.

That said, a friend and I made a deck using Trakmark for his bathing platform.
But rather than fit it ourselves, we asked a local tradesman who refused to you the ARBOMERIC MP20, insisting on using his own adhesive.
He did a very good job fitting it.
I have yet to ask him what he uses but it will be interesting to find out.
 

Hurricane

Well-known member
Joined
11 Nov 2005
Messages
9,397
Location
Sant Carles de la Ràpita
Visit site
Just reviving this old thread before setting off to Spain to do the next phase of Jennywren's synthetic project.
The Cockpit

Last autumn, I "Templated" it all up - using the same template material that I use for my sewing projects.
I cut the material and stuck it down with some double sided tape - writing notes and dimensions over the templates.
I also take lots of photos because I make all my synthetic teak panels at home in the UK and I need reminders all the time.

20231009_170631.resized.jpg

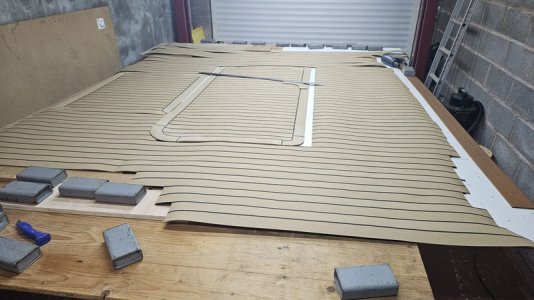
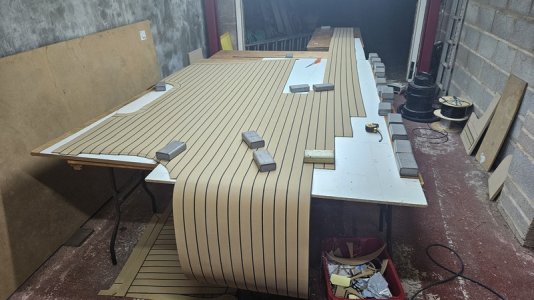
Anyway, I've spent the winter months welding up panels for the cockpit.
In its own way, this phase is more challenging than the previous ones.
In January, I cleared some space in the garage and started work.
Even though it was a bit of a squeeze.

20240117_162746.resized.jpg

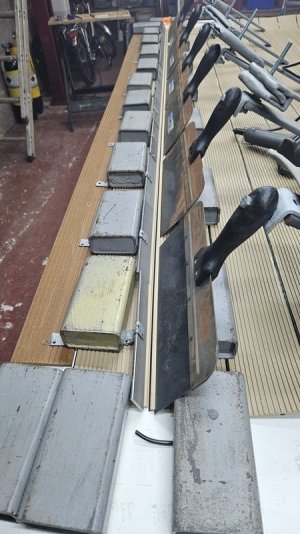
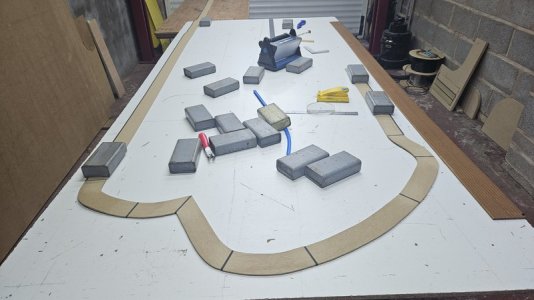
Here is one of the synthetic teak strips ready for welding.
It is vital that any joints to be welded are weighted down - absolutely no gaps.

20240112_182131.resized.jpg


The side deck panels were too long to fit in the garage without opening the door.

20240203_183851.resized.jpg

Although it all rolls up nicely, I've made it in five main sections plus the hatches and borders.
My thoughts are that I will weld the borders in place when I get down to the actual boat.
At the moment, the panels are roughly cut (within 50mm) of the edges.
The process will be to put the panels in place and then lay the pre-made borders on top.
Then mark/cut/weld the borders into the panels.
That way, it has a better chance of fitting.
It is a huge problem making this kind of thing 1000 miles away from the boat and expecting it to fit when you get there.

This is the border that will (hopefully) fit around the flybridge stairs.

20240207_110133.resized.jpg

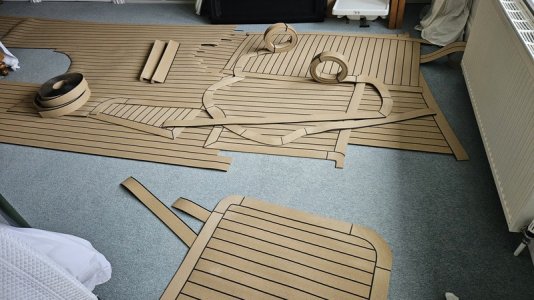
After making it, I took the liberty of storing it all in the spare bedroom - with SWMBO's permission - of course!!

20240208_131747.resized.jpg

But it is all now loaded into the (donkey box) trailer and we are booked on a ferry out of Plymouth on Sunday.

When we get there, I am hoping that will only take a couple or three days to assemble/weld the panels together.

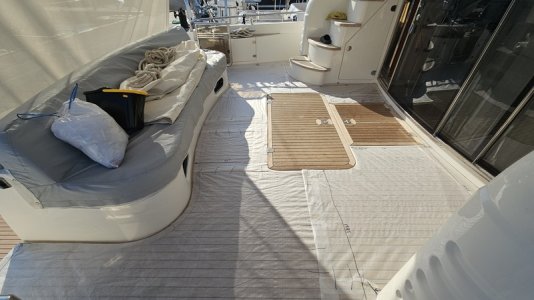
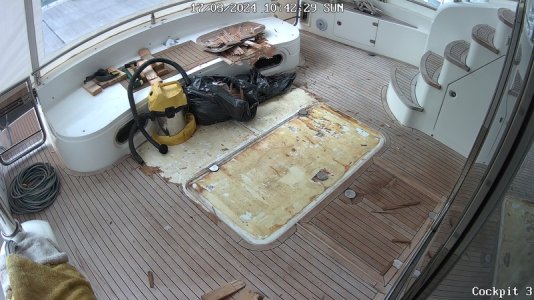
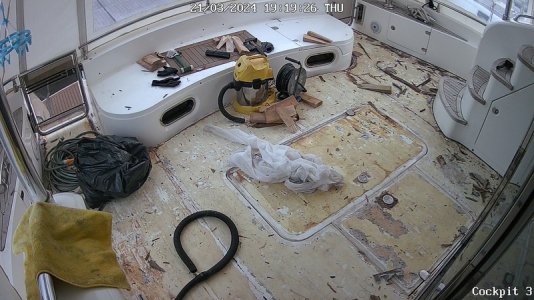
Last week, a local contractor in Sant Carles started the horrible job of removing the old wooden teak from Jennywren's cockpit.
You will notice that I'm not there - these photos were taken by JW's cockpit security camera.

Reolink Camera Part Stripped 1.resized.jpg

That was last week - this is today's progress.

Reolink Camera Part Stripped 4.resized.jpg

As to be expected, there is some damage to the GRP that will need to be repaired and the whole surface smoothed out before we fit the new synthetic teak.

I have asked the local guy that is doing this for me to finish the job using the panels that I've made - assuming they fit!!
I hope you find this interesting - I will add more photos over the next few weeks - IF it all works!!!
 

Tony W

Member
Joined
6 Feb 2019
Messages
60
Visit site
I’ve been following this for while, loaded with practical advice and experiences, many thanks.
some damage to the GRP that will need to be repaired and the whole surface smoothed out before we fit the new synthetic teak.
How much T&E do you put into this, thinking about it this could be a huge job in itself, what’s been your MO with the other decks, to what lengths do you go and how?
 

MapisM

Well-known member
Joined
11 Mar 2002
Messages
20,345
Visit site
How much T&E do you put into this
Based on my experience, the short answer to your question is a lot.
In fact, I also had the OEM teak deck stripped in my boat after purchasing her, as discussed in this thread, and I can confirm that stripping the old stuff and GRP mending/preparation is much harder than anyone would expect.
Whenever I say it's silly to cover GRP decks with teak (mind, I owned a timber boat for almost two decades, a construction where teak decks come with the territory, so to speak, and I have nothing against that), I hear plenty of objections. BUT, none of them come from folks who actually saw how GRP decks can suffer from such useless encapsulation - for years, and constantly exposed to weather.
IMHO, decks are one of the (few!) boat construction components where plastic fantastic make a lot of sense, but that's almost completely lost when you stick teak above them. :unsure:
 

Alicatt

Well-known member
Joined
6 Nov 2017
Messages
4,442
Location
Eating in Eksel or Ice Cold in Alex
Visit site
Wife has said that she likes the look of the synthetic teak and wants the cockpit done in it. Mike see what you have done with all this fabulous work? ;)
Another task added to the list, but way down on it, there is some type of lino/vinyl on it at the moment and it is a bit worn out and stained but while I am working in a mucky bilge it can stay.
 

PCUK

Well-known member
Joined
29 Jun 2005
Messages
7,957
Location
Westleigh, Nr Tiverton, Devon.
Visit site
Alicatt, have a look at the old school faux teak that I believe is now supplied by TEK-DEK. It is installed in place on the boat and requires no special tools or templates. Hurricane has the equipment so that is the right choice for him and a brilliant job he is doing too. I've recently completed an old school installation using the last Dek King stocks from Wilks. However you proceed it is well worth the effort.
 

Hurricane

Well-known member
Joined
11 Nov 2005
Messages
9,397
Location
Sant Carles de la Ràpita
Visit site
Alicatt, have a look at the old school faux teak that I believe is now supplied by TEK-DEK. It is installed in place on the boat and requires no special tools or templates. Hurricane has the equipment so that is the right choice for him and a brilliant job he is doing too. I've recently completed an old school installation using the last Dek King stocks from Wilks. However you proceed it is well worth the effort.
TEK-DEK is, in fact the same stuff as Trakmark. Use TEK-DEK if you want someone to do it for you or Trakmark if you want to buy it DIY. The same guy owns both companies. He also sells Trakmark to the trade so you can get the same material from other contractors.

Update
Arrived here in Spain 36 hours ago but it was raining most of yesterday - nice and sunny today (I bet you can't say the same for the UK today!!).
Worked inside the cockpit yesterday doing the rough cuts and I'm quite pleased with the way it is fitting.
As I said, it is difficult doing this kind of thing 1000 miles from the boat.
I will take some more pics later today.
 

Hurricane

Well-known member
Joined
11 Nov 2005
Messages
9,397
Location
Sant Carles de la Ràpita
Visit site
I’ve been following this for while, loaded with practical advice and experiences, many thanks.

How much T&E do you put into this, thinking about it this could be a huge job in itself, what’s been your MO with the other decks, to what lengths do you go and how?
As MapisM says. There is a lot of prep work that needs to be done after the old teak has been removed.
Particularly where the old teak was screwed down.
I also have about 9" square where water has got under the first layer of glass so that needs to be broken out, dried and re-glassed.
But it is good to get to these areas now before they become a bigger problem later.
 

Hurricane

Well-known member
Joined
11 Nov 2005
Messages
9,397
Location
Sant Carles de la Ràpita
Visit site
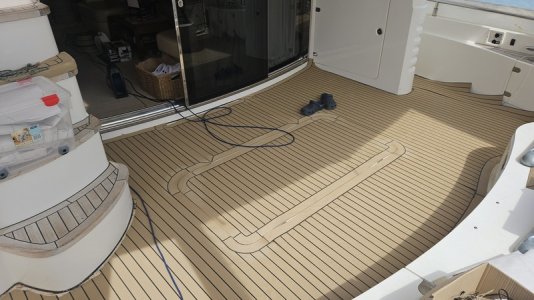
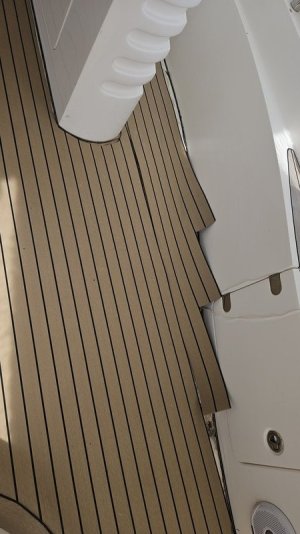
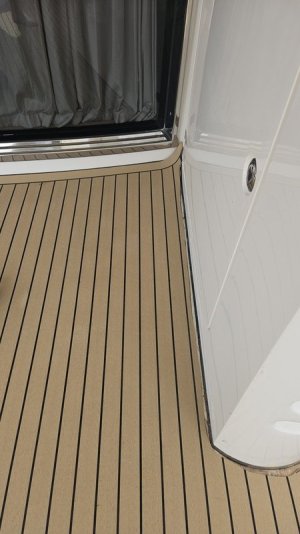
Photos as at lunch time today.

I'm please with the overall fitting - made from templates and extra measurements taken in January.

20240327_132207.resized.jpg

Just rough cuts so far
From this

20240327_132135.resized.jpg

To this - border strips are made and waiting to be welded in.
In fact this border was done after the photo was taken.

20240327_132146.resized.jpg

20240327_132154.resized.jpg

20240327_132159.resized.jpg

Got a bit more done to the starboard side this afternoon - no pics.
I hope to finish the starboard fitting tomorrow morning but we are all going out to a nice restaurant for our Easter treat (early because it was full over the weekend).
So that will slow the progress for a day or so.
 

Hurricane

Well-known member
Joined
11 Nov 2005
Messages
9,397
Location
Sant Carles de la Ràpita
Visit site
I think this is one of most satisfying jobs to do, albeit very time consuming and sometimes fiddly. I imagine you agree or you wouldn't be doing it!
Actually, I'm glad that I'm getting to the end now. If I were ever to buy a new boat, I would get someone else to do it but I know what I want from a job like this now so it would be difficult for a contractor to satisfy me.

That said, I don't regret learning all this and I will keep doing plastic teak jobs as they come up.
 

Other threads that may be of interest

Top